
CLEAN WATER TANK
With this video, you can quickly master the art of cleaning your water tank in just one minute. If you feel like the video plays too fast to understand key details, you can go to the steps section for more detailed information.


 NOTE
NOTE
The machine requires regular maintenance to ensure normal operation of the machine and achieve the best dehumidification effect.

1
2
3
4
5
6

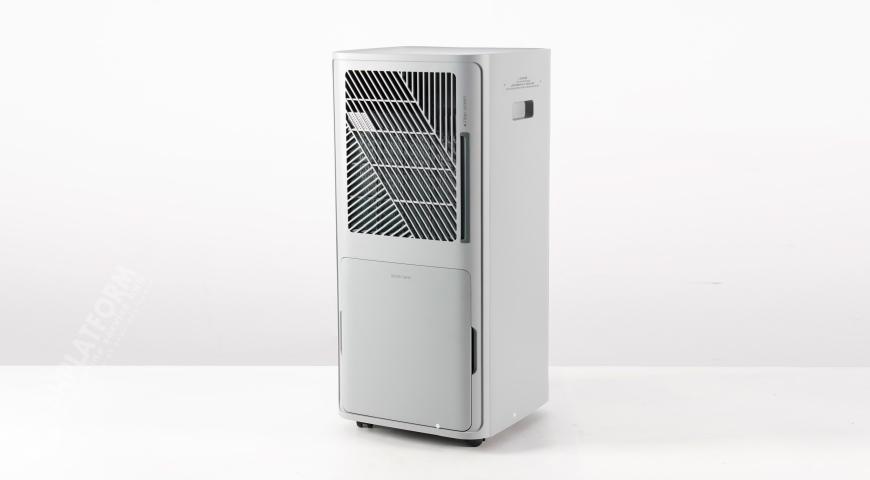
PROCEDURE 1:Open water tank
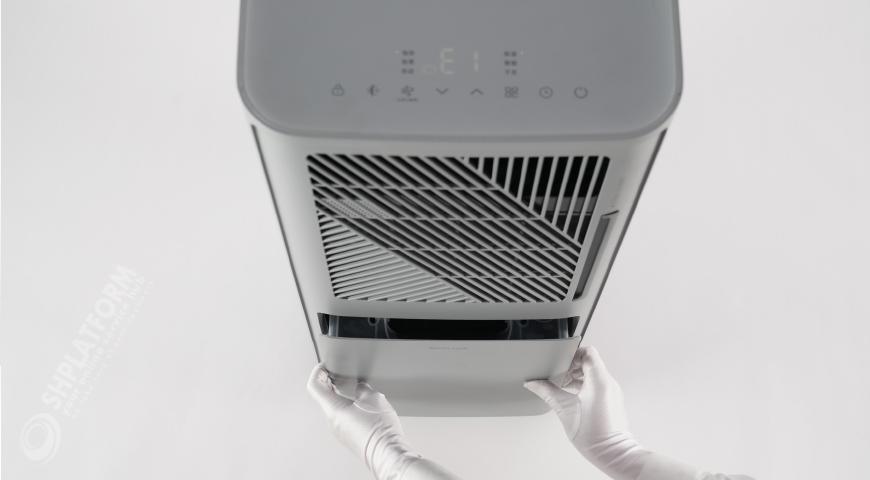
When the water tank is full, the machine will display an E1 fault prompt.
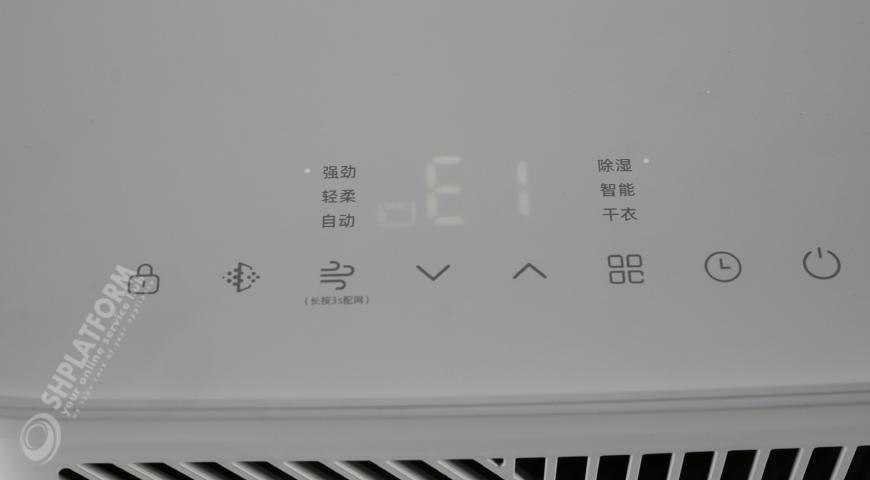
When the water tank is full, the machine will display an E1 fault prompt.
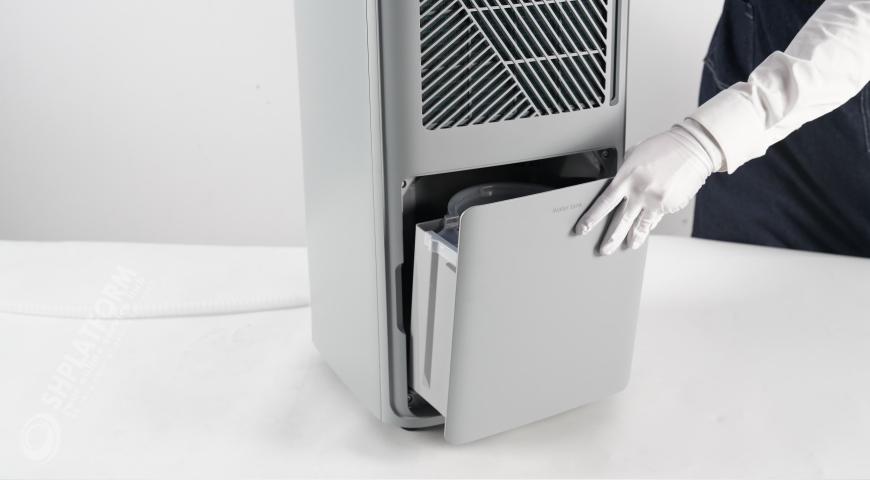
Take out the decorative panel on the front of the machine.
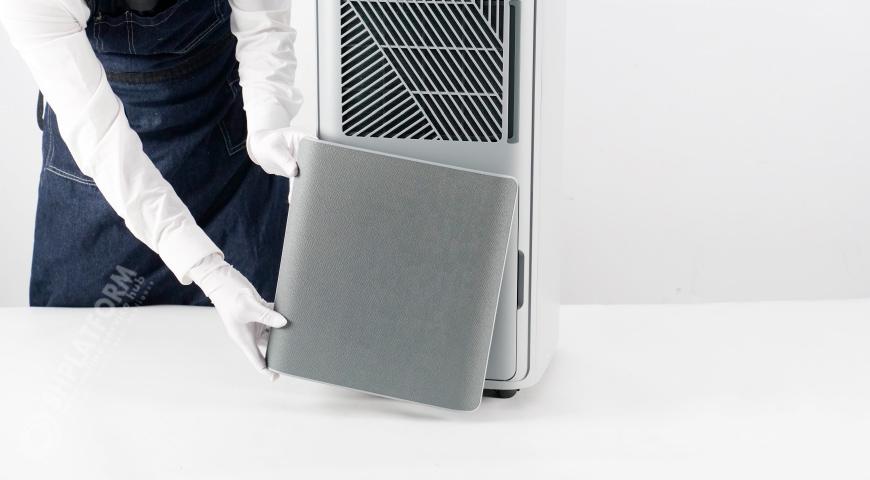
Take out the decorative panel on the front of the machine.
The decorative panel and the machine are magnetically attracted together and can be taken out easily.
The decorative panel and the machine are magnetically attracted together and can be taken out easily.
Before removing the water tank, loosen the water tank by hand.
Before removing the water tank, loosen the water tank by hand.
Use two hands to remove the water tank.
Use two hands to remove the water tank.
At this time, the water tank is full. Please handle it with care to prevent the water in the water tank from overflowing.
At this time, the water tank is full. Please handle it with care to prevent the water in the water tank from overflowing.

PROCEDURE 2: Drain the water from the tank
Put your hand on the handle of the water tank and lift the water tank away.
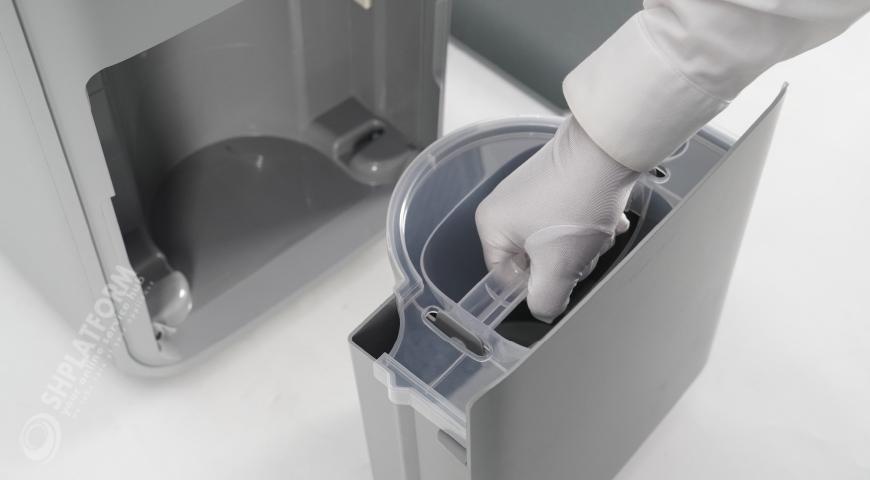
Put your hand on the handle of the water tank and lift the water tank away.
Lift the water tank into the drainage channel and dump it out.
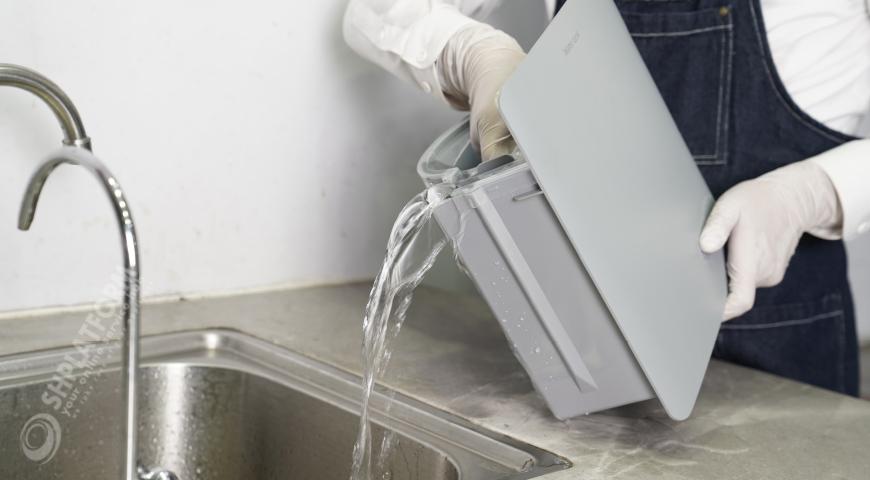
Lift the water tank into the drainage channel and dump it out.
The water tank has a water outlet, please pay attention to the direction of pouring water.
The water tank has a water outlet, please pay attention to the direction of pouring water.

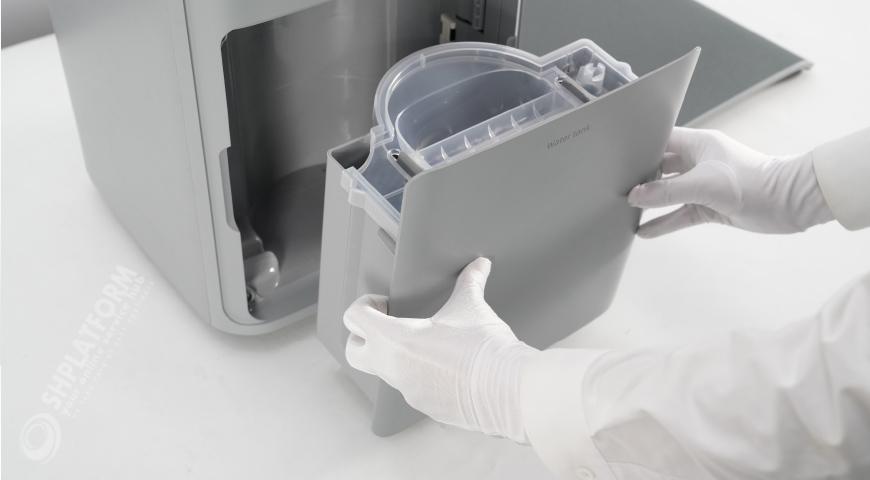
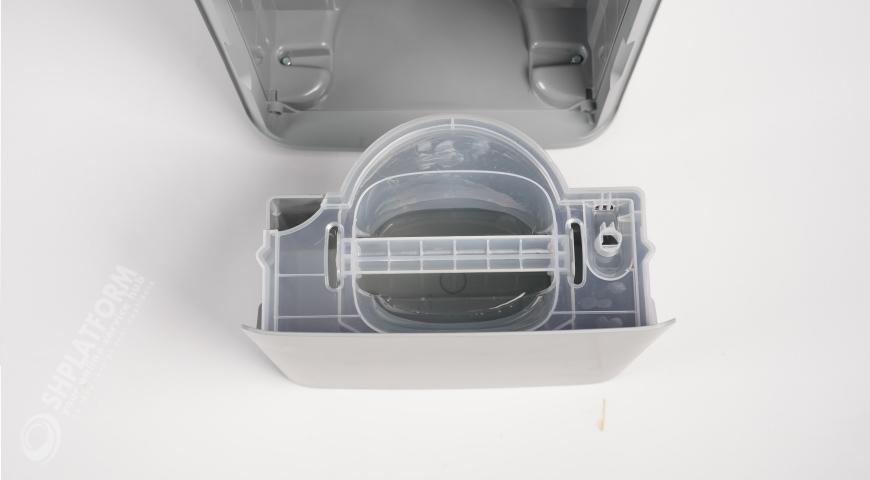
PROCEDURE 3: Remove the lid of water tank
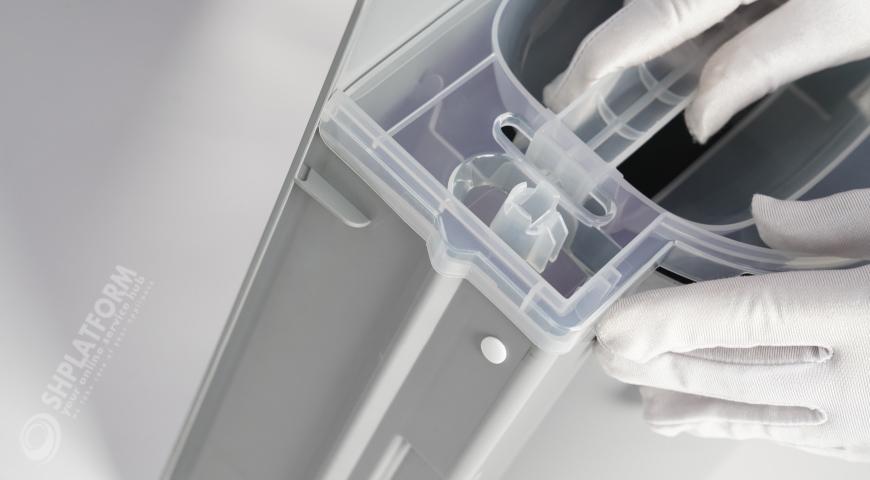
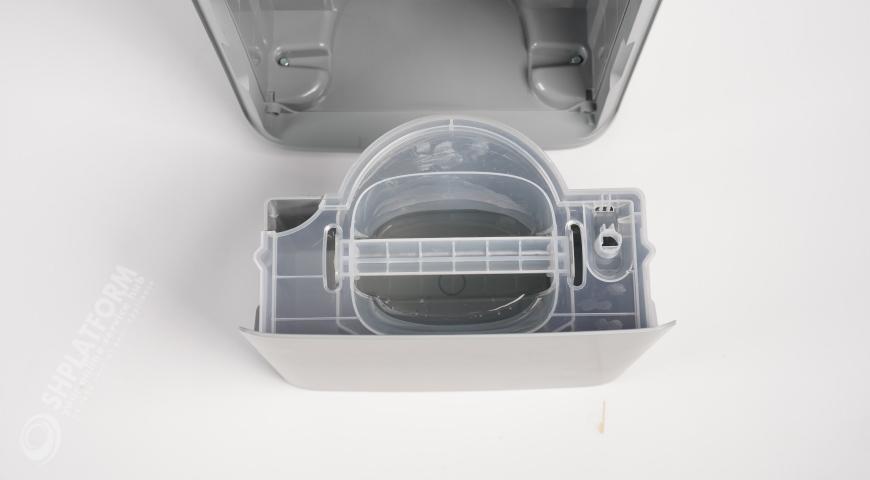
Hold the handle assembly of water tank with one hand, and push away the plastic chip on the handle assembly with the other hand to release the buckle of the handle assembly.
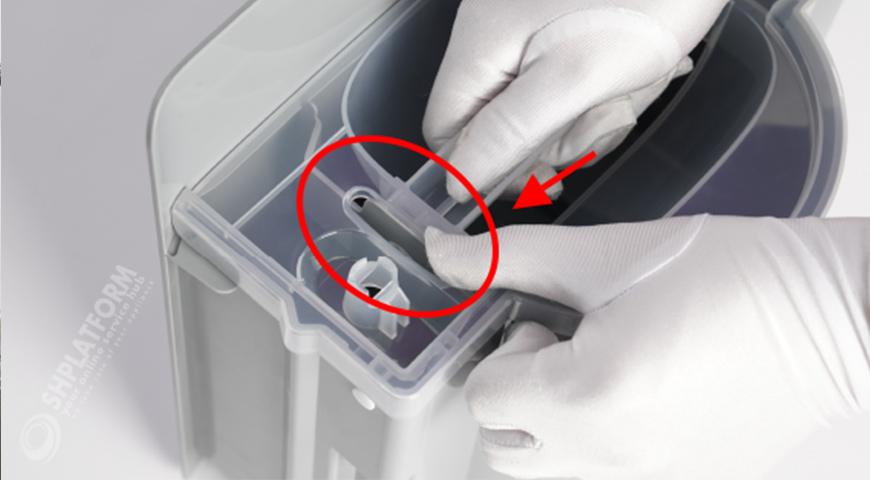
Hold the handle assembly of water tank with one hand, and push away the plastic chip on the handle assembly with the other hand to release the buckle of the handle assembly.
The water tank handle and the water tank are buckled together, and you need to push the buckle to release the two components.

The water tank handle and the water tank are buckled together, and you need to push the buckle to release the two components.
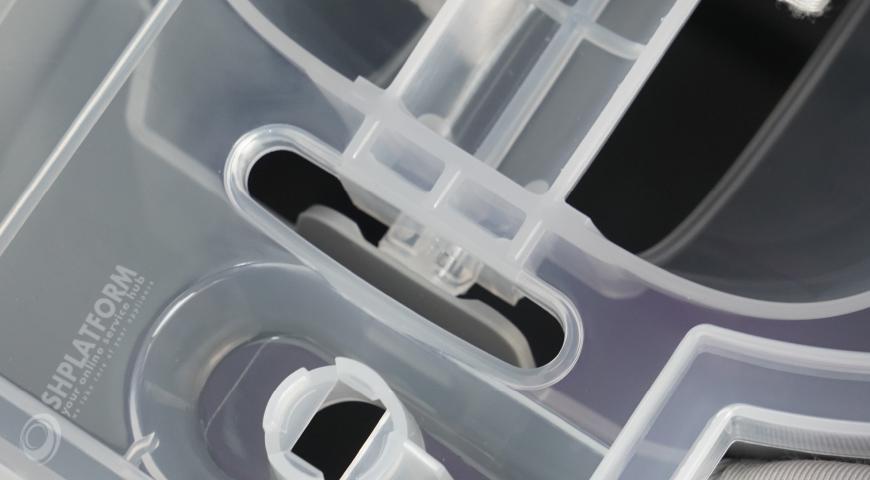
Detach the water tank handle assembly from the water tank buckle.
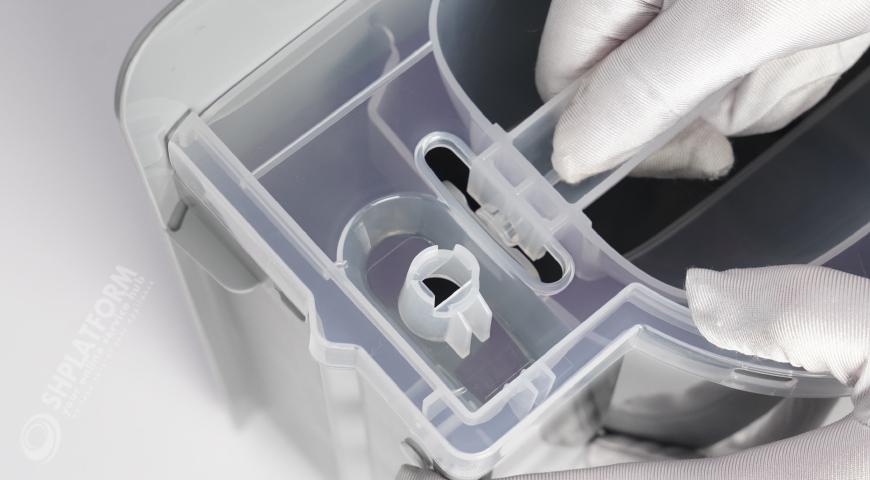
Detach the water tank handle assembly from the water tank buckle.
Release the other end of the water tank handle assembly.
Release the other end of the water tank handle assembly.
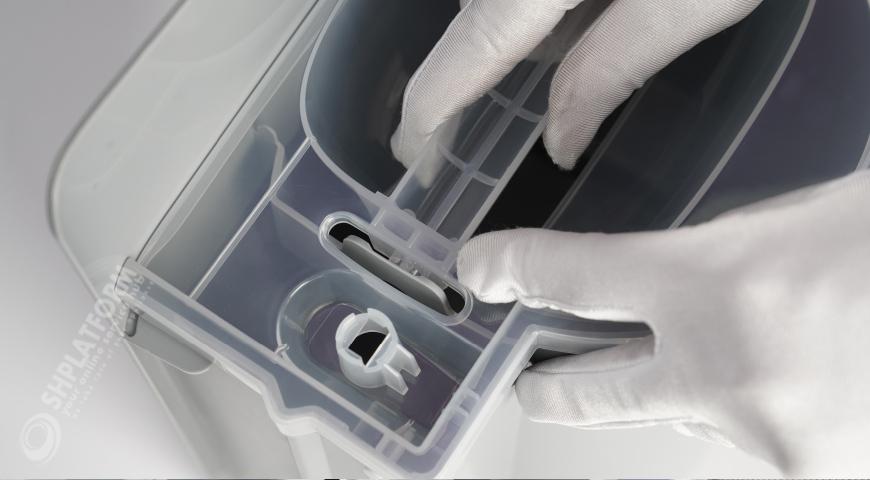
Take out the water tank handle assembly.
Take out the water tank handle assembly.

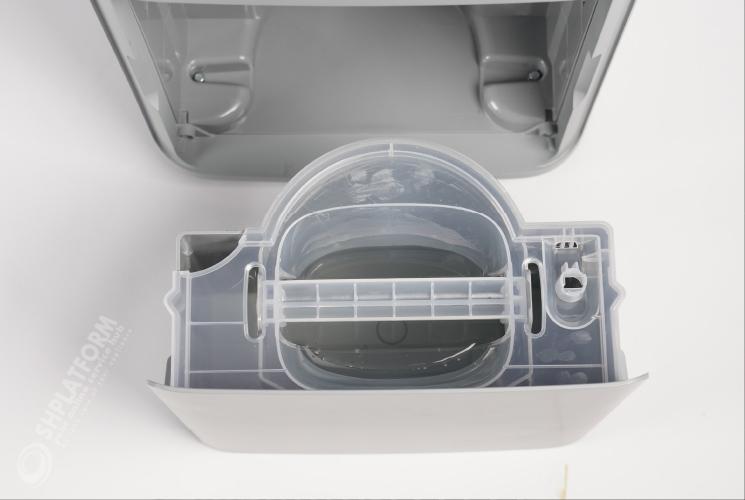
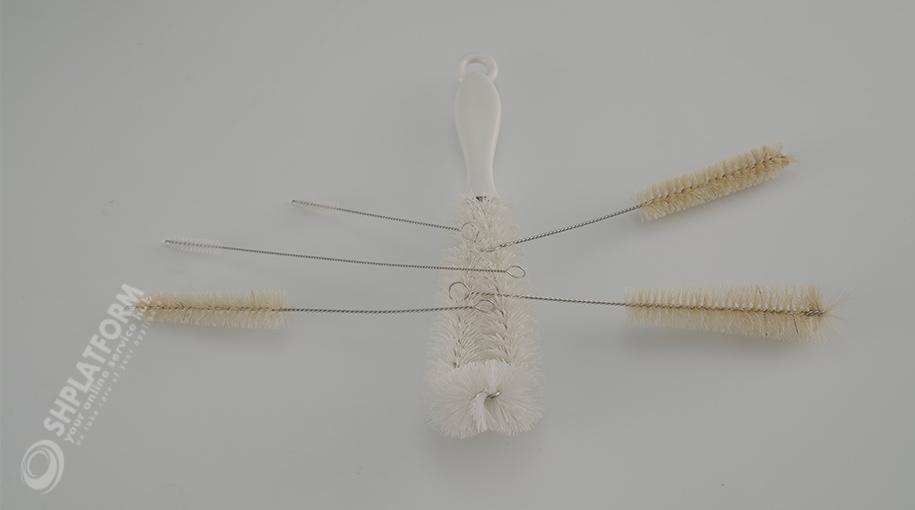
PROCEDURE 4: Clean water tank
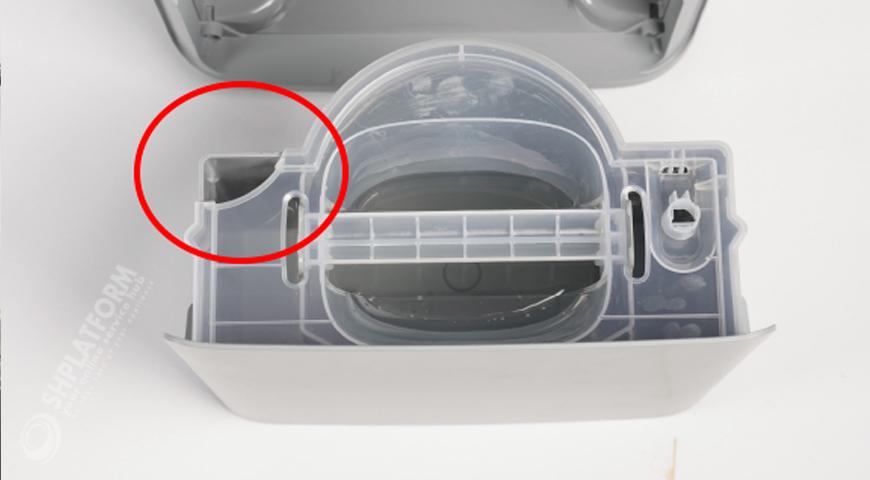
Use a brush to clean the inside of the tank.
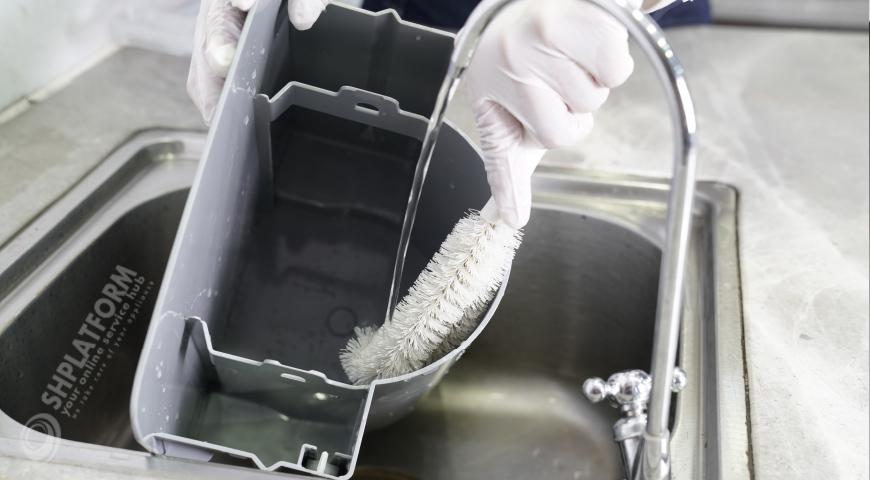
Use a brush to clean the inside of the tank.
Use a brush to clean the hard-to-clean areas on the left and right sides of the water tank.
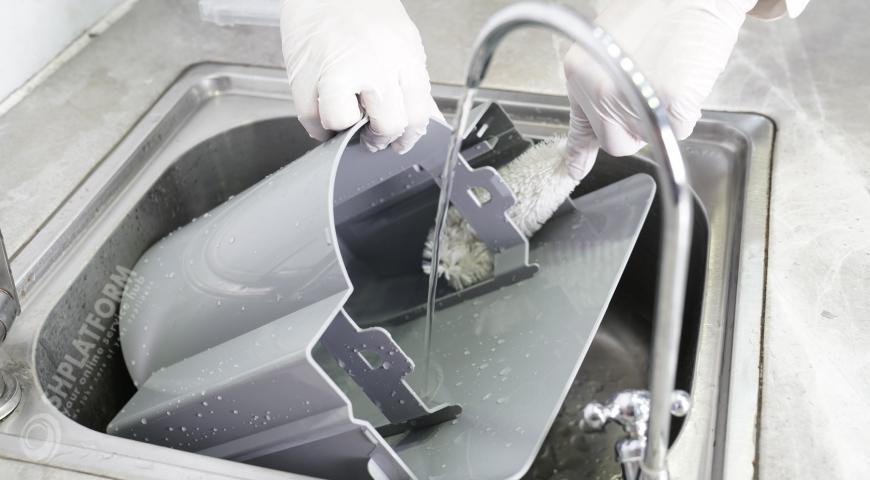
Use a brush to clean the hard-to-clean areas on the left and right sides of the water tank.
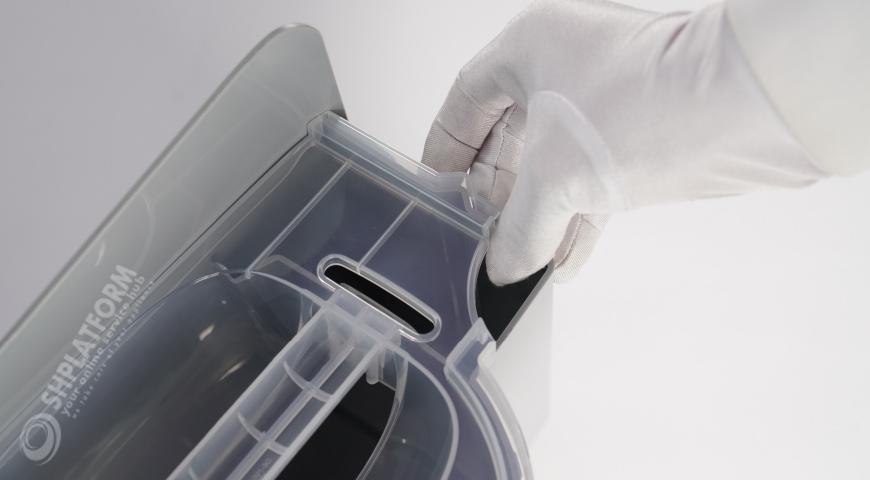
Wash the outer wall of the water tank.
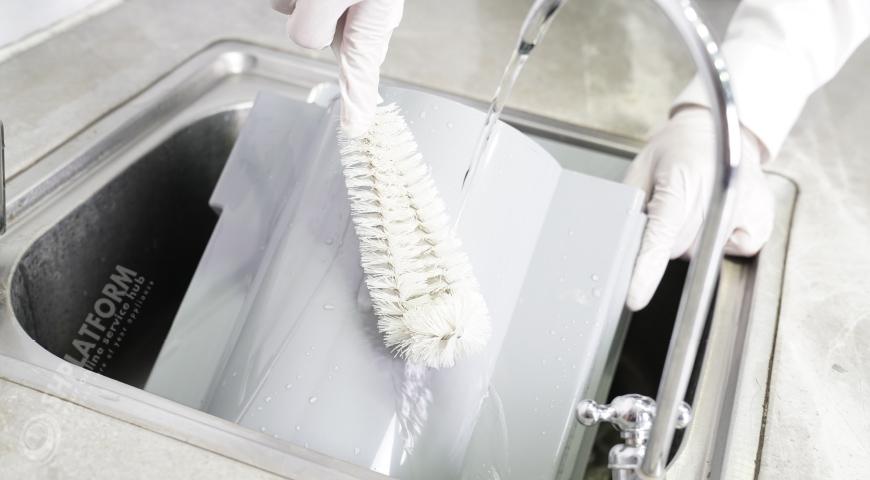
Wash the outer wall of the water tank.
Flush tank handle assembly.
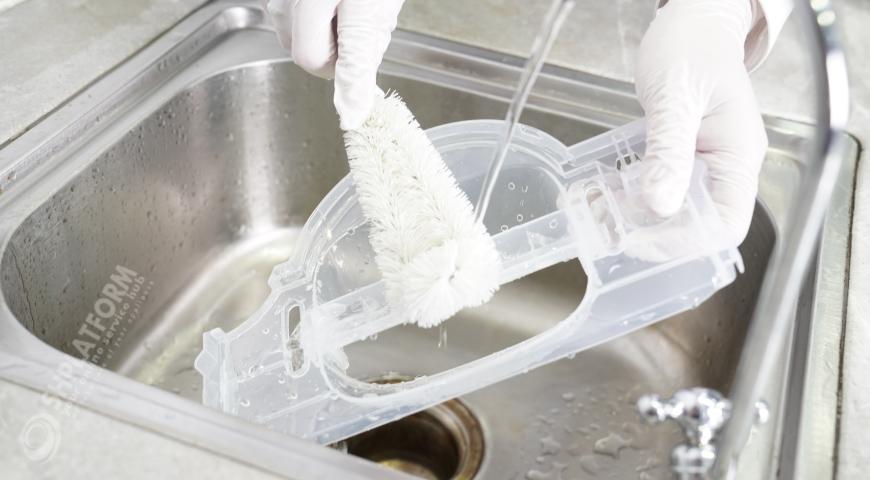
Flush tank handle assembly.
PROCEDURE 5:Install the lid of water tank back
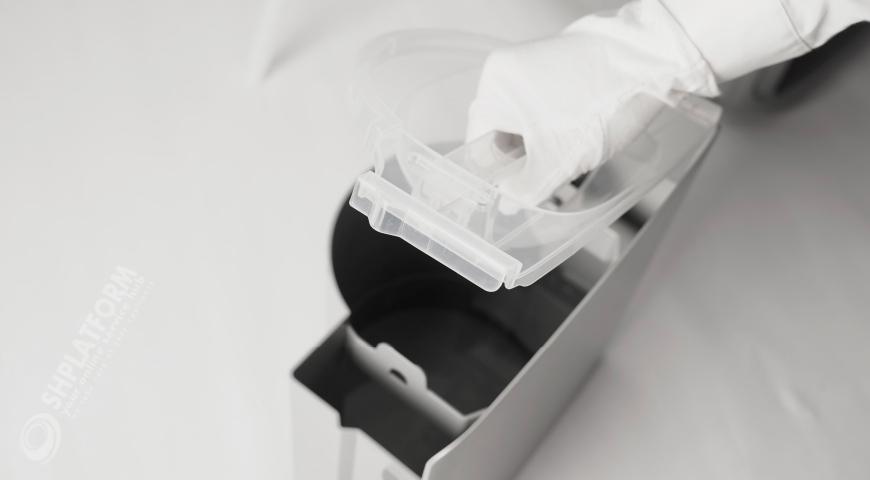
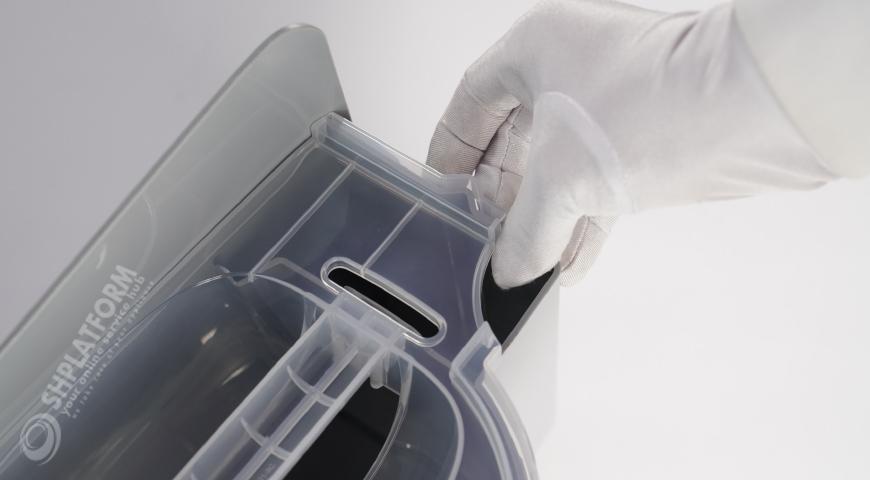
Reinstall the water tank handle assembly.

Reinstall the water tank handle assembly.
Attach the water tank handle assembly to the water tank.
Attach the water tank handle assembly to the water tank.
The buckle of the water tank handle must be assembled with the fixing hole of the water tank.
The buckle of the water tank handle must be assembled with the fixing hole of the water tank.
Press it down with a little force, and then check whether it is assembled in place when you hear a click.
Press it down with a little force, and then check whether it is assembled in place when you hear a click.
Press the other end down similarly, and assemble the buckle of the handle with the fixing hole of the water tank.
Press the other end down similarly, and assemble the buckle of the handle with the fixing hole of the water tank.
PROCEDURE 6:Install the decroative cover of water tank back
Install the assembled water tank back to its right place.
Install the assembled water tank back to its right place.
Install the water tank back.
Install the water tank back.
Make sure that the water tank is properly assembled, the machine would give a reminder of E1 out if the water tank is not properly assembled.
Make sure that the water tank is properly assembled, the machine would give a reminder of E1 out if the water tank is not properly assembled.
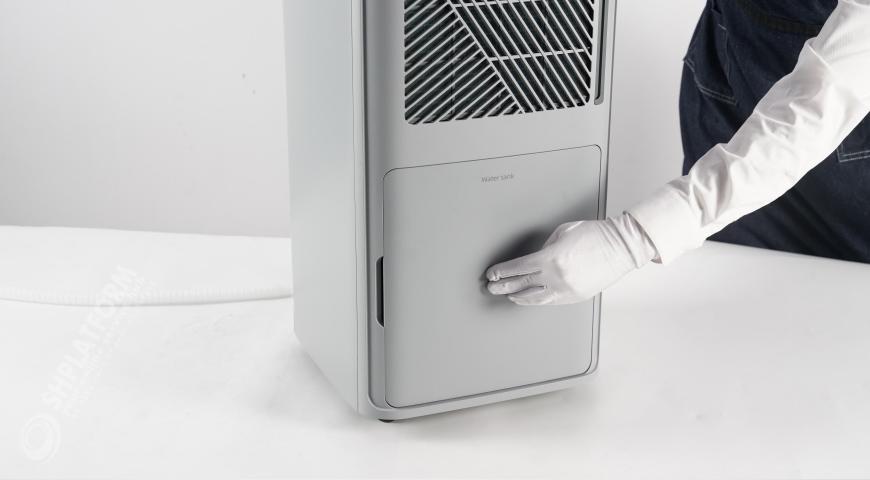
Install the decorative panel back.

Install the decorative panel back.
The decorative board is attracted to the machine through a magnet, and can be easily attracted when placed properly.
The decorative board is attracted to the machine through a magnet, and can be easily attracted when placed properly.

© Copyright 2023 SHPlatform | All rights reserved