
If you feel that the video is playing too fast to understand key details, you can follow steps below to get more detailed information.

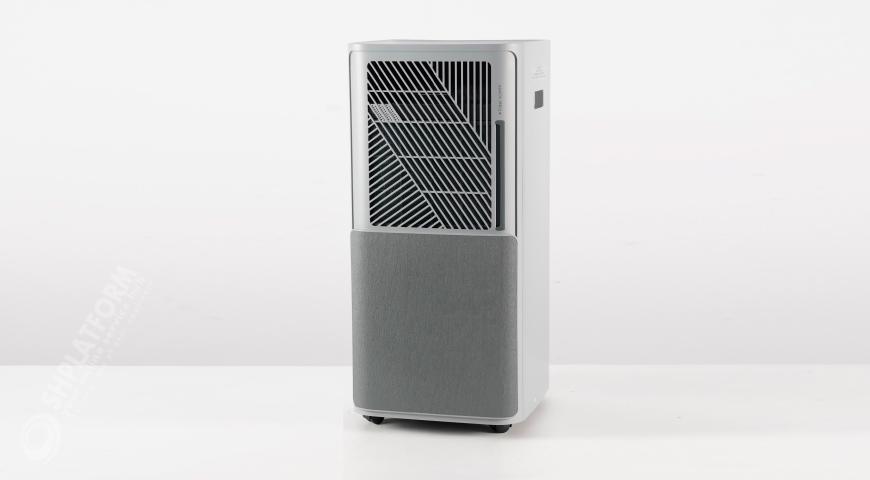
Reminders on display
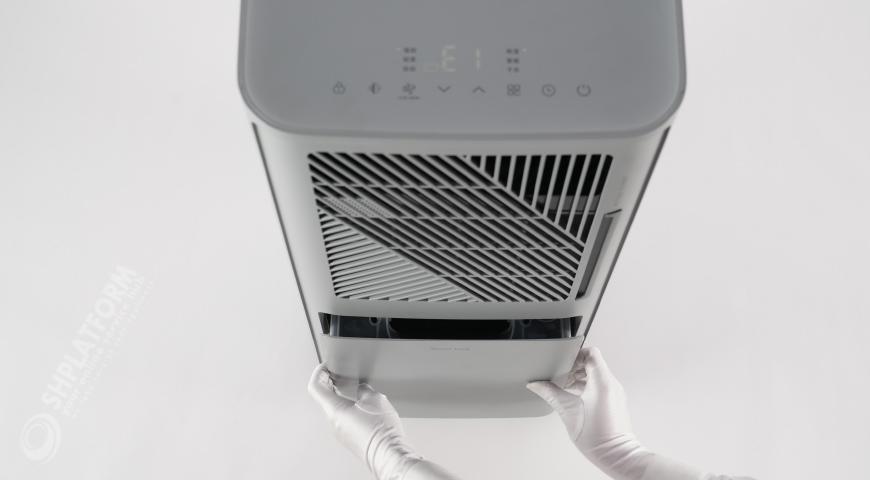
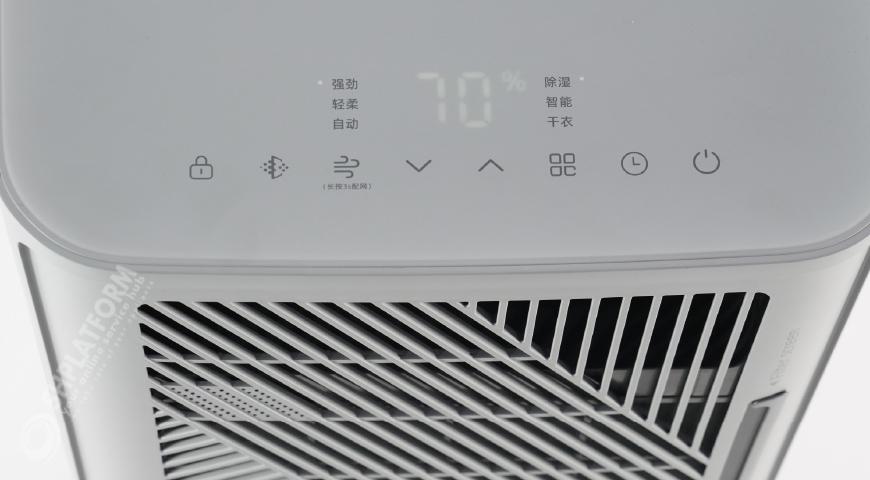
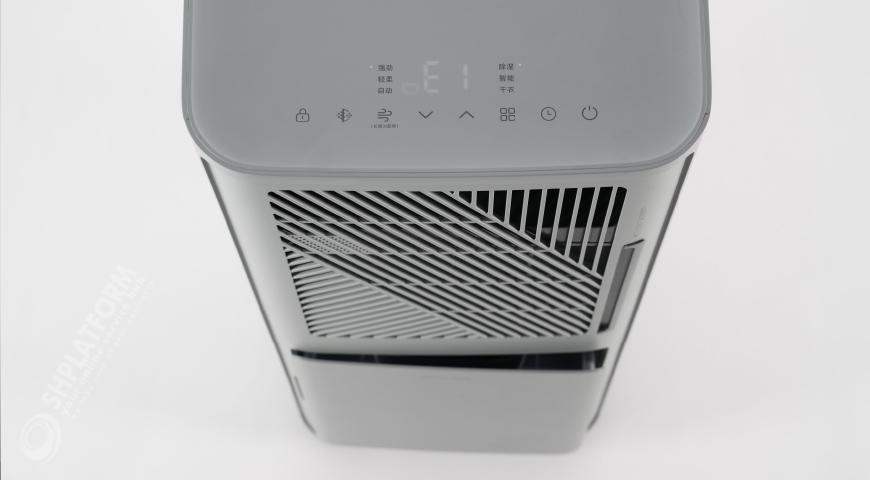
Error code E1 appears on display panel of machine, indicating that the water tank is not installed or full of water.
When the error code appears, the machine will stop working.

When the water level sensor detects full water for 3 consecutive seconds, the water level sensor is disconnected. After 3 minutes, the machine stops, the water full indicator light lights up, and the machine display panel reports error code E1.
If the water tank in the machine is full or the water tank is not installed properly, the machine will report an error code E1 on display panel.
The water tank in the machine is full and the buoy rises to a position where the water level sensor cannot detect it, causing an alarm.

The water tank in the machine is not full, but the buoy is stuck at the top of the channel, preventing the sensor from detecting it, causing a false alarm.

The water tank is not installed properly and the buoy deviates from the range that the sensor can detect, causing an alarm.
Other reasons
The video introduces how to check whether the water tank is full of water, and shows the operation of draining the water from water tank to solve the E1 fault reported on the display screen of machine.
 NOTE
NOTE
When the machine detects that the water tank is full during 3 consecutive seconds (the water level sensor is turned off at this moment), the compressor immediately stops working and the fan continues to run. After 3 minutes, the machine shuts down and stops working, the water full indicator light lights up, and a full water alarm is given out, the machine display panel reports error code E1;

If you feel that the video is playing too fast to understand key details, you can follow steps below to get more detailed information.
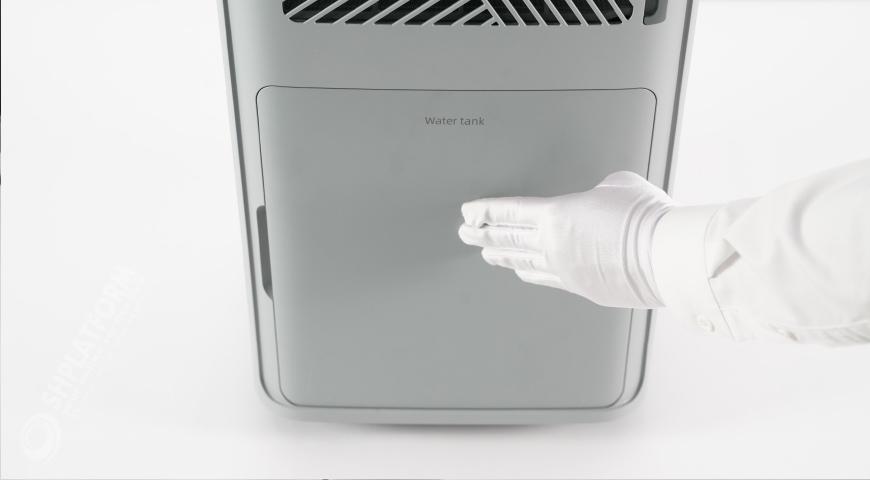
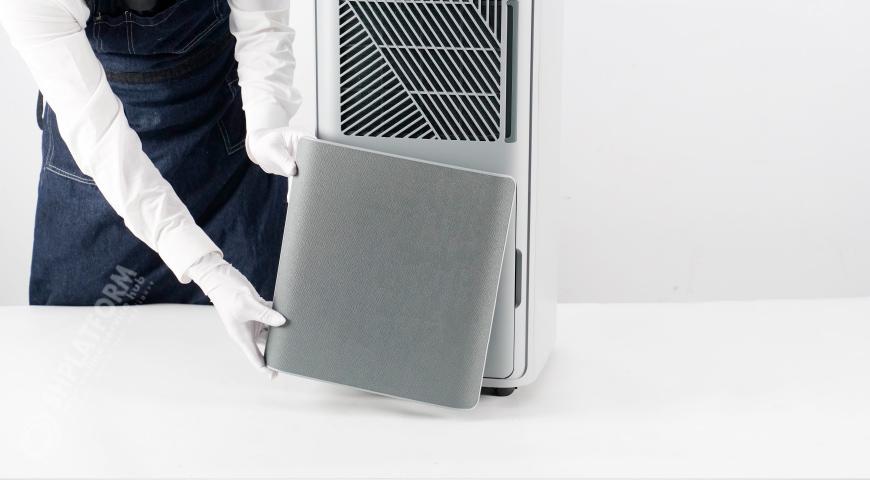
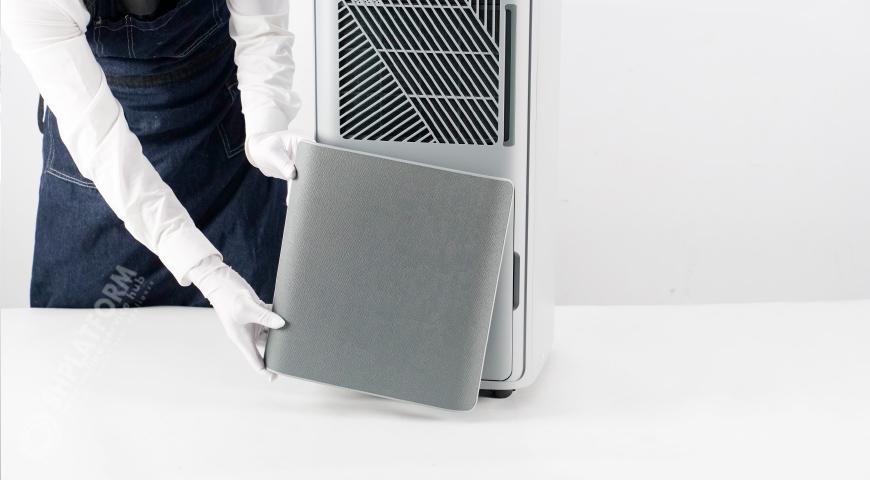
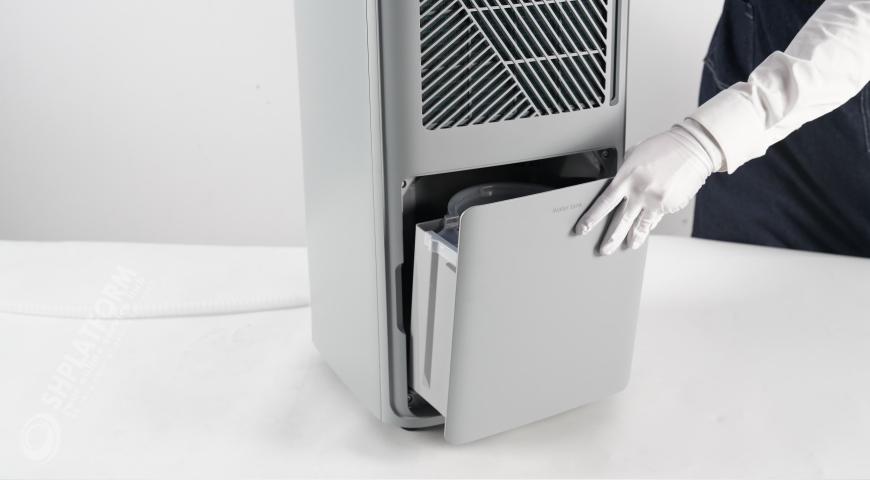
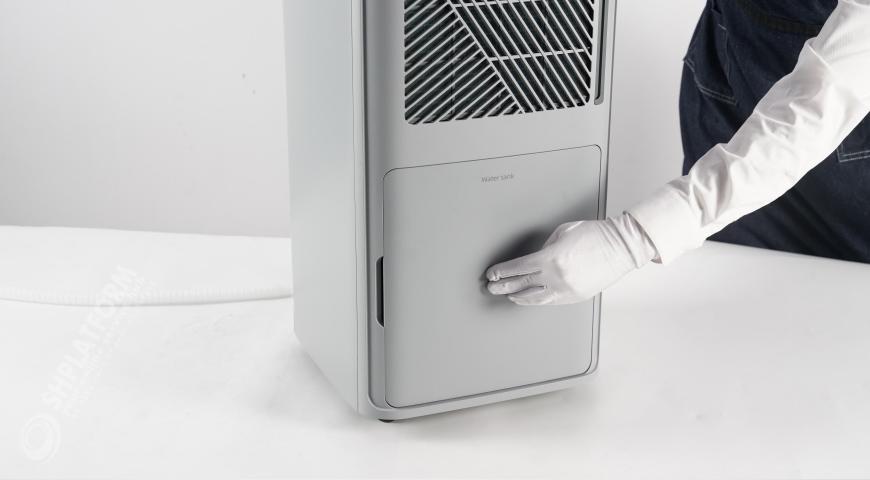
Take out the decorative panel on the front of the machine.

Take out the decorative panel on the front of the machine.
The decorative panel and the machine are magnetically attracted together and can be taken out easily.
The decorative panel and the machine are magnetically attracted together and can be taken out easily.
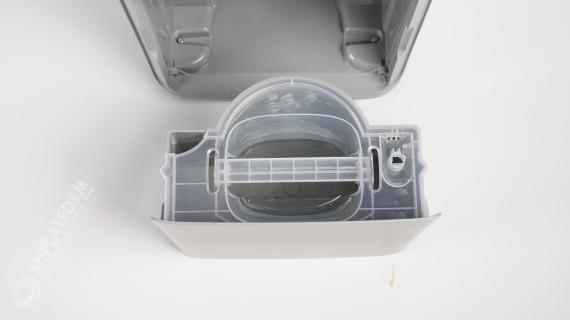
Before removing the water tank, loosen the water tank by hand.
Before removing the water tank, loosen the water tank by hand.
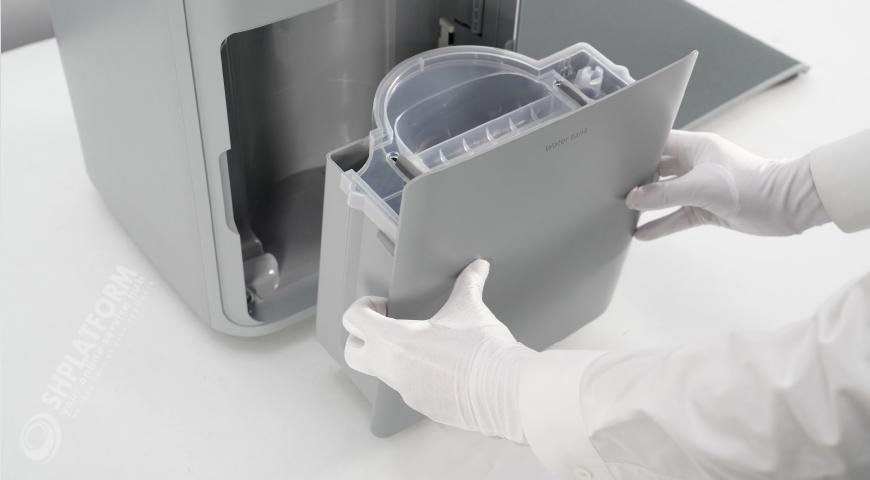
Use two hands to remove the water tank.

Use two hands to remove the water tank.
At this time, the water tank is full. Please handle it with care to prevent the water in the water tank from overflowing.
At this time, the water tank is full. Please handle it with care to prevent the water in the water tank from overflowing.
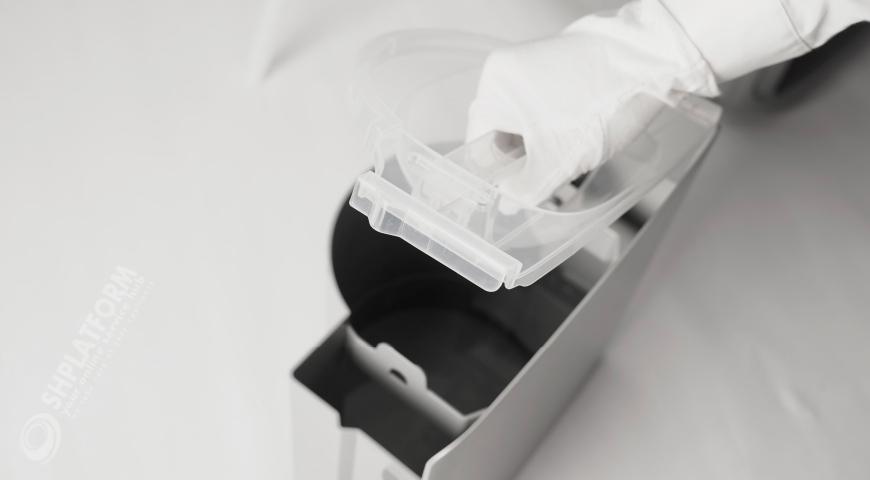
Put your hand on the handle of the water tank and lift the water tank away.
Put your hand on the handle of the water tank and lift the water tank away.
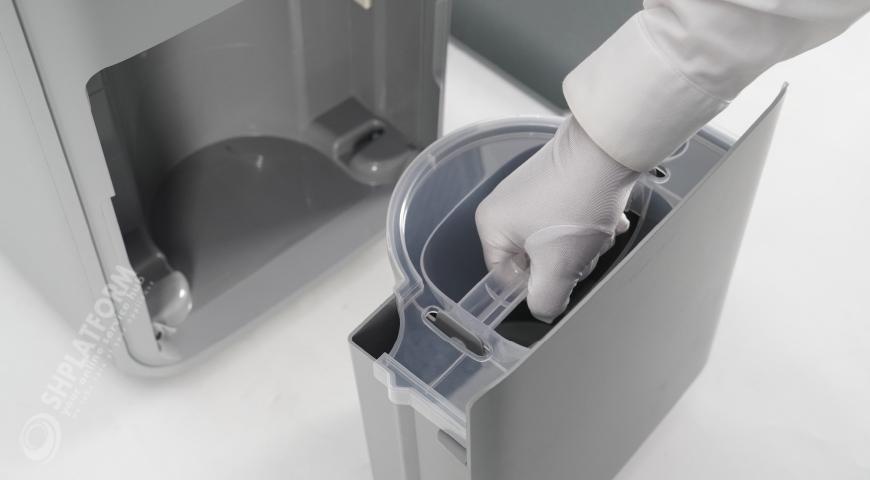
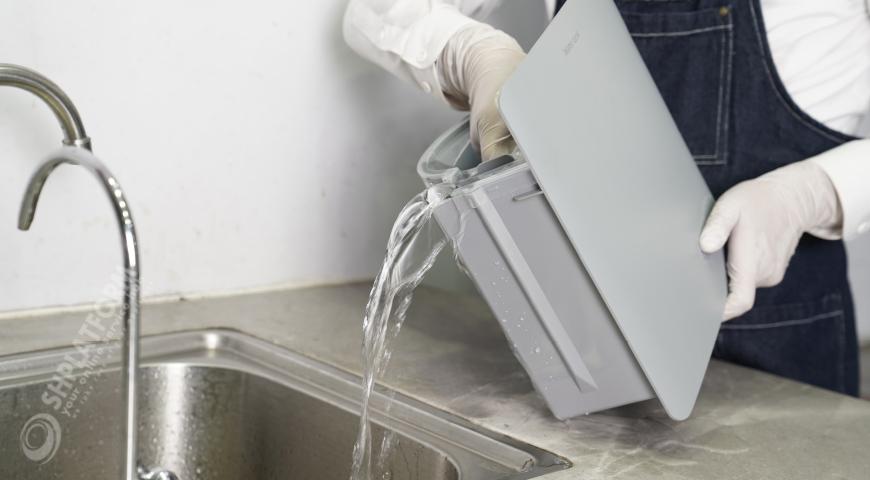
Lift the water tank into the drainage channel and dump it out.

Lift the water tank into the drainage channel and dump it out.
The water tank has a water outlet, please pay attention to the direction of pouring water.
The water tank has a water outlet, please pay attention to the direction of pouring water.
Install the water tank back.

Install the water tank back.
Make sure that the water tank is properly assembled, the machine would give a reminder of E1 out if the water tank is not properly assembled.
Make sure that the water tank is properly assembled, the machine would give a reminder of E1 out if the water tank is not properly assembled.
When the water tank is assembled in place, the error code E1 is eliminated.
When the water tank is assembled in place, the error code E1 is eliminated.
Install the decorative panel back.
Install the decorative panel back.


1
2
3
4
5
6

PROCEDURE 1:Open water tank
Take out the decorative panel on the front of the machine.
Take out the decorative panel on the front of the machine.
The decorative panel and the machine are magnetically attracted together and can be taken out easily.

The decorative panel and the machine are magnetically attracted together and can be taken out easily.
Before removing the water tank, loosen the water tank by hand.

Before removing the water tank, loosen the water tank by hand.
Use two hands to remove the water tank.
Use two hands to remove the water tank.
此There may be water in the water tank at this time, please handle it with care to prevent the water in the water tank from overflowing.
此There may be water in the water tank at this time, please handle it with care to prevent the water in the water tank from overflowing.

PROCEDURE 2: Drain the water from the tank
Put your hand on the handle of the water tank and lift the water tank away.
Put your hand on the handle of the water tank and lift the water tank away.
Lift the water tank into the drainage channel and dump it out.
Lift the water tank into the drainage channel and dump it out.
The water tank has a water outlet, please pay attention to the direction of pouring water.

The water tank has a water outlet, please pay attention to the direction of pouring water.

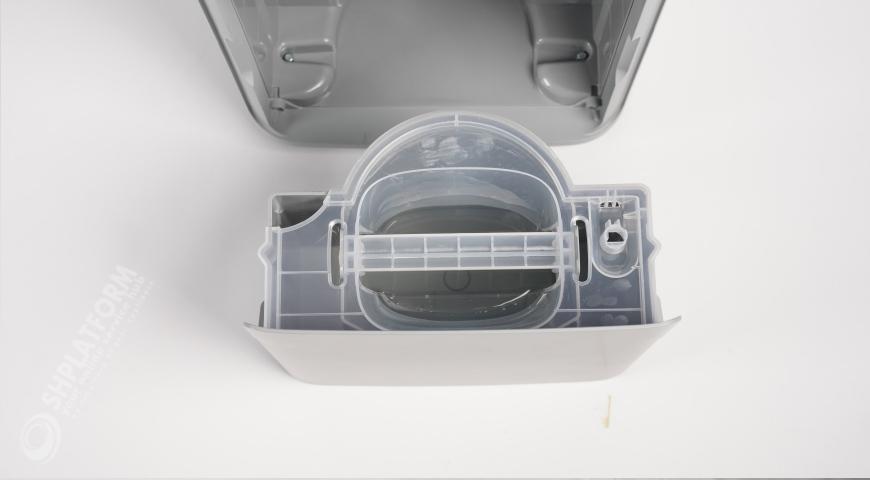
PROCEDURE 3: Remove the lid of water tank
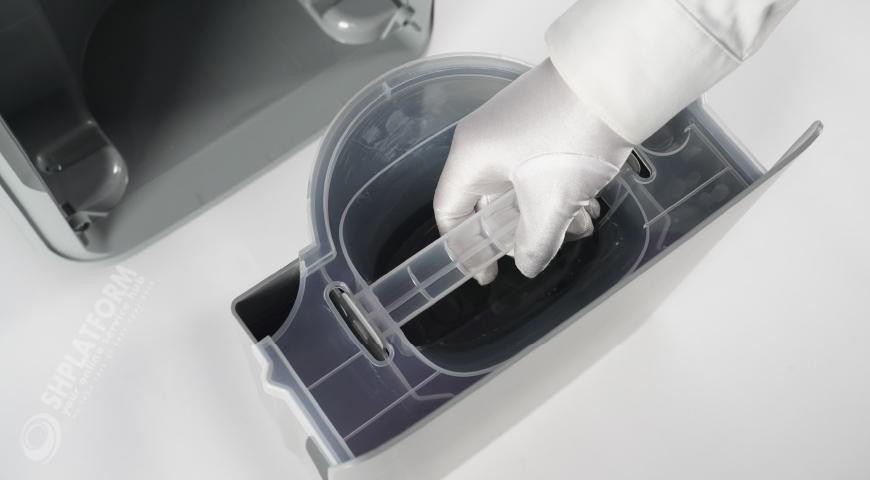
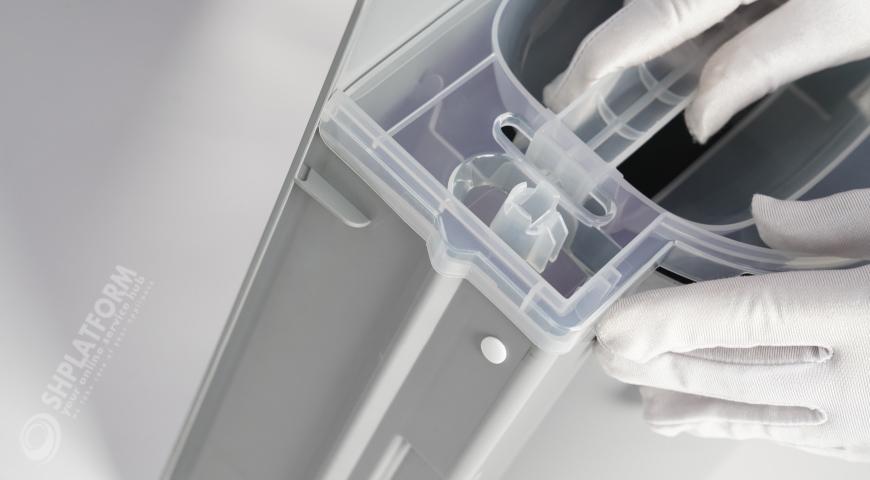
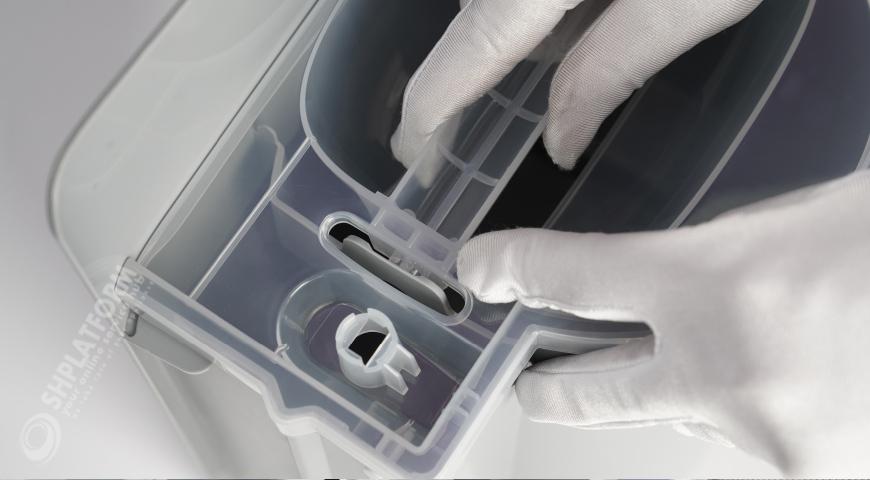
Hold the handle assembly of water tank with one hand, and push away the plastic chip on the handle assembly with the other hand to release the buckle of the handle assembly.
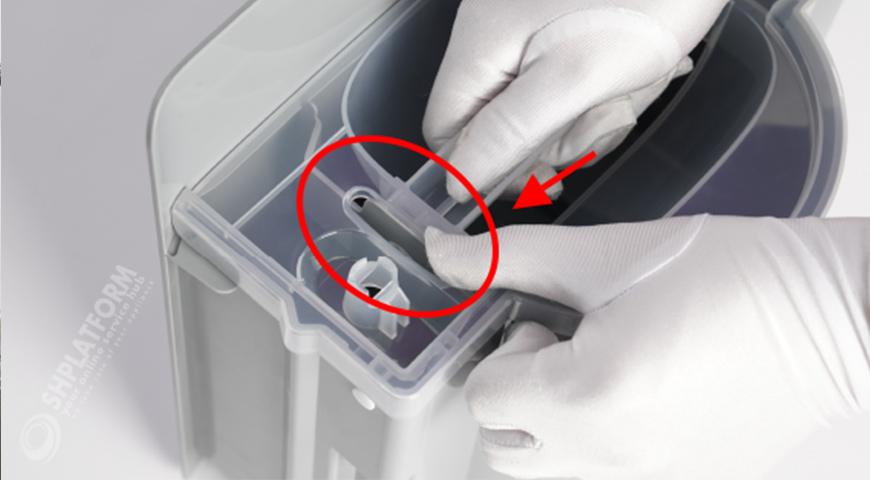
Hold the handle assembly of water tank with one hand, and push away the plastic chip on the handle assembly with the other hand to release the buckle of the handle assembly.
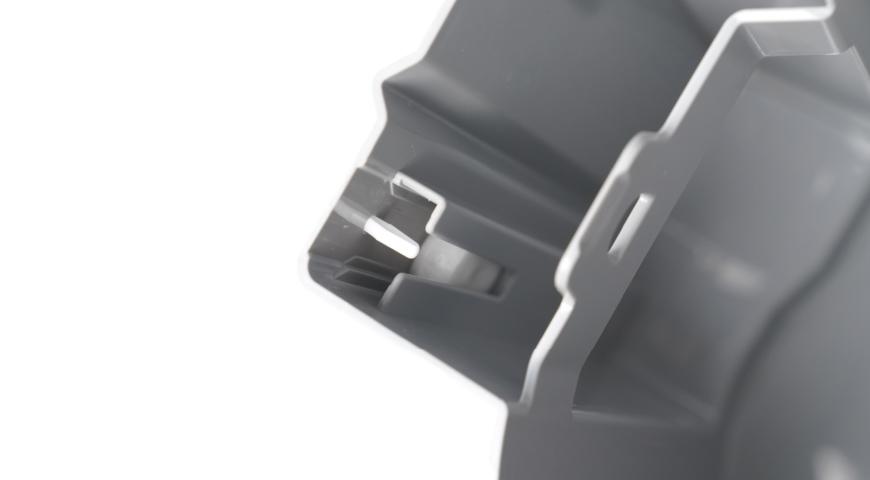
The water tank handle and the water tank are buckled together, and you need to push the buckle to release the two components.

The water tank handle and the water tank are buckled together, and you need to push the buckle to release the two components.
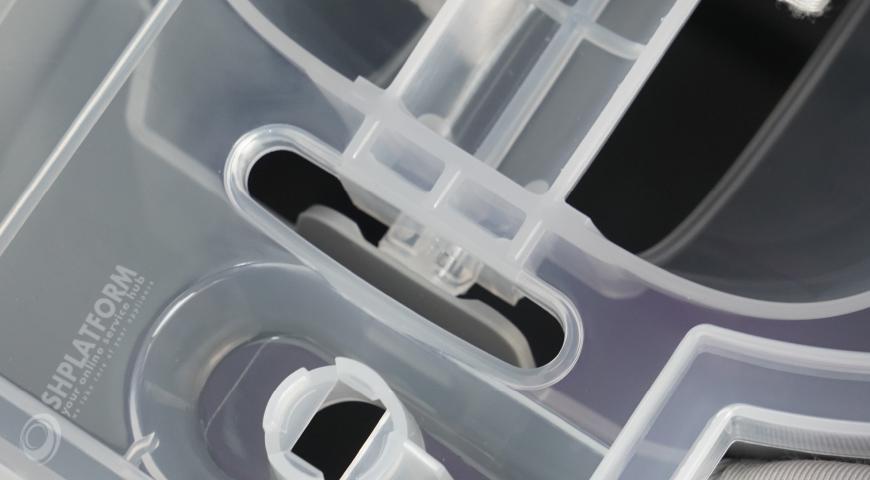
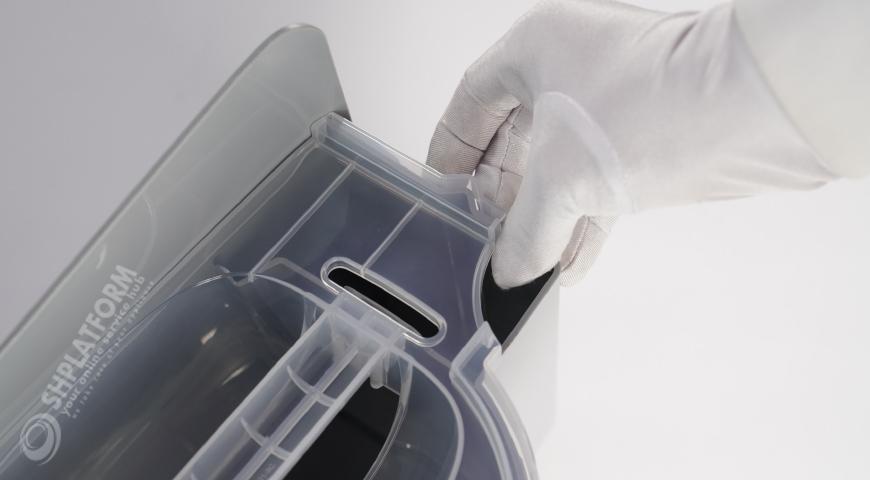
Detach the water tank handle assembly from the water tank buckle.
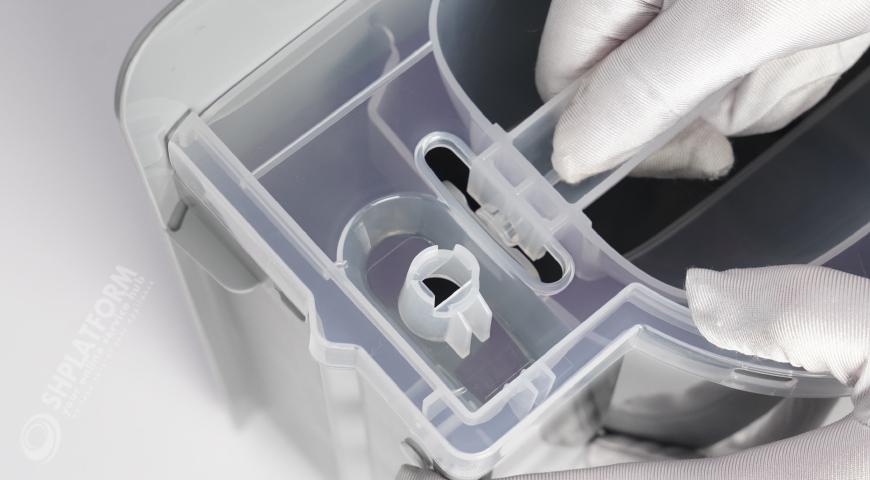
Detach the water tank handle assembly from the water tank buckle.
Release the other end of the water tank handle assembly.
Release the other end of the water tank handle assembly.
Take out the water tank handle assembly.
Take out the water tank handle assembly.

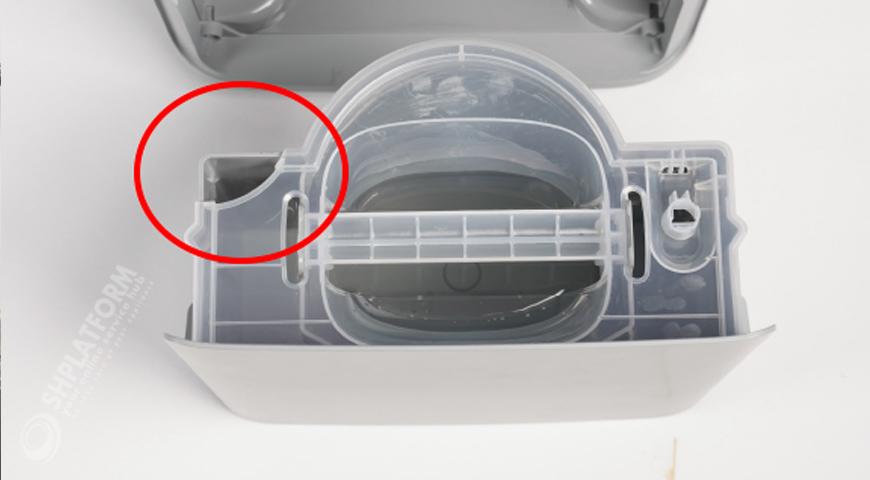
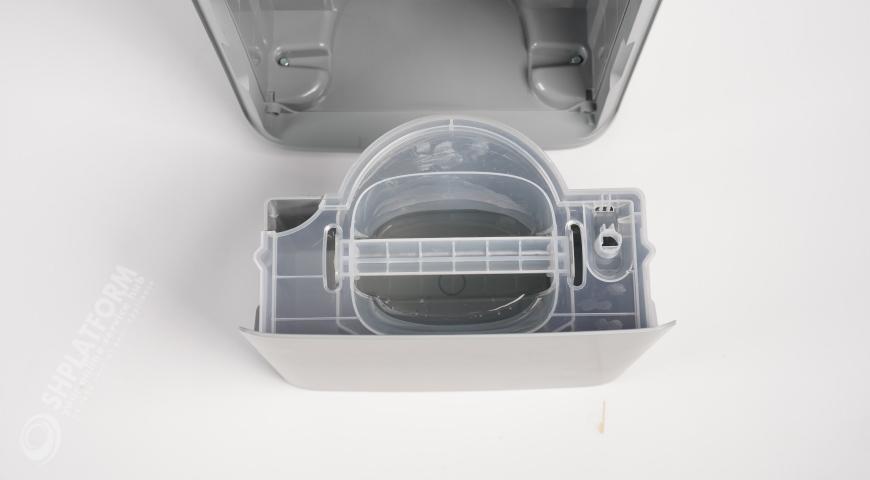
PROCEDURE 4: Check the buoy
Slide the buoy manually to check if the buoy is stuck.
If the buoy is manually slid and the alarm is eliminated, the problem is solved.
If not, please follow the steps below to check.
Slide the buoy manually to check if the buoy is stuck.
If the buoy is manually slid and the alarm is eliminated, the problem is solved.
If not, please follow the steps below to check.
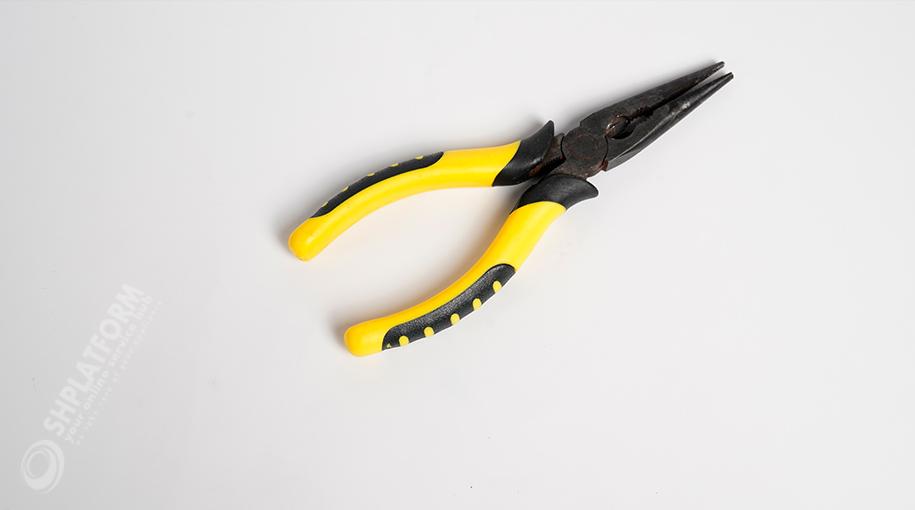
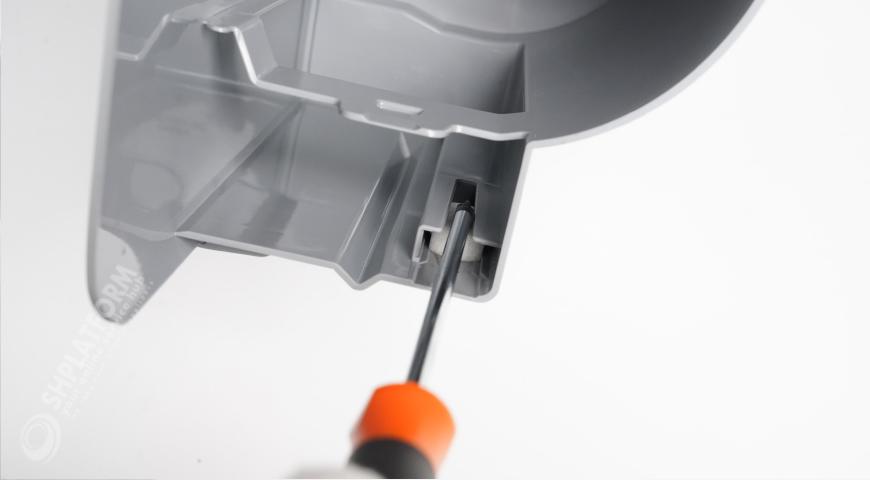
Use pliers to pinch the swollen part of the expansion rivet and push the rivet outward.
Use pliers to pinch the swollen part of the expansion rivet and push the rivet outward.
Pull out the rivets from the outside.

Pull out the rivets from the outside.
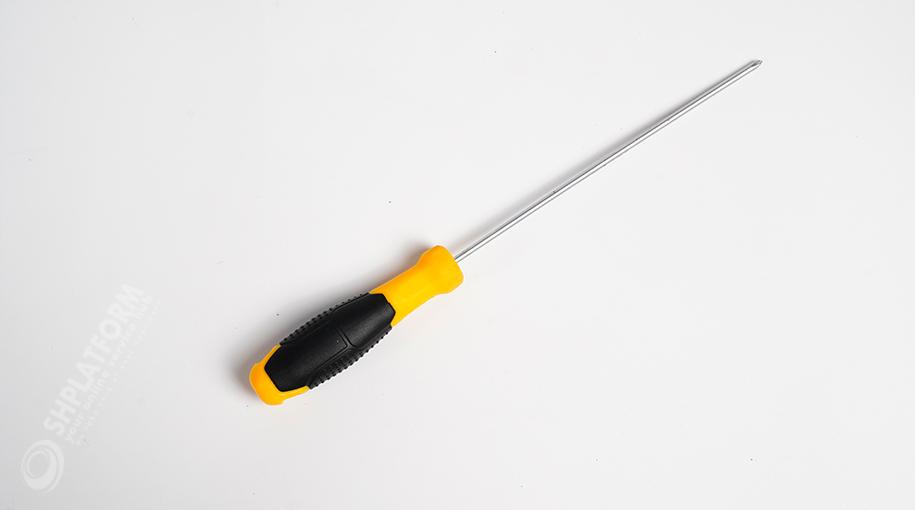
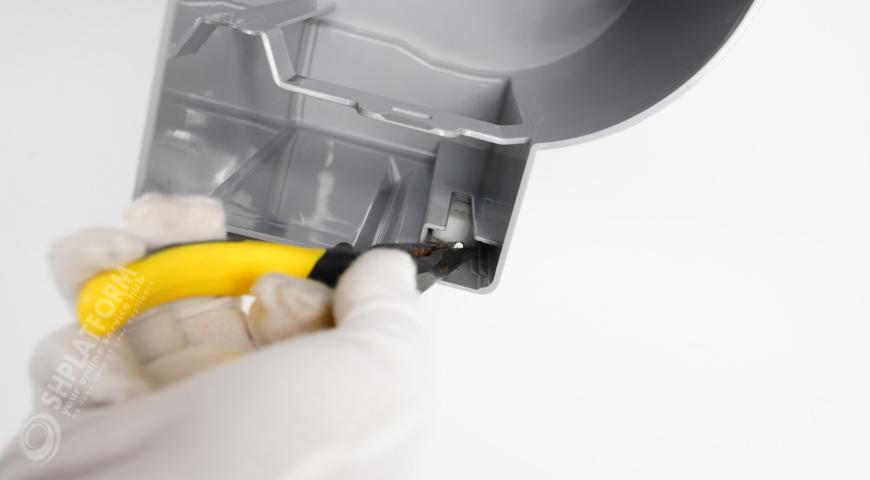
The buoy has a magnetic block. Use a screwdriver to hold the buoy and remove it.
The buoy has a magnetic block. Use a screwdriver to hold the buoy and remove it.
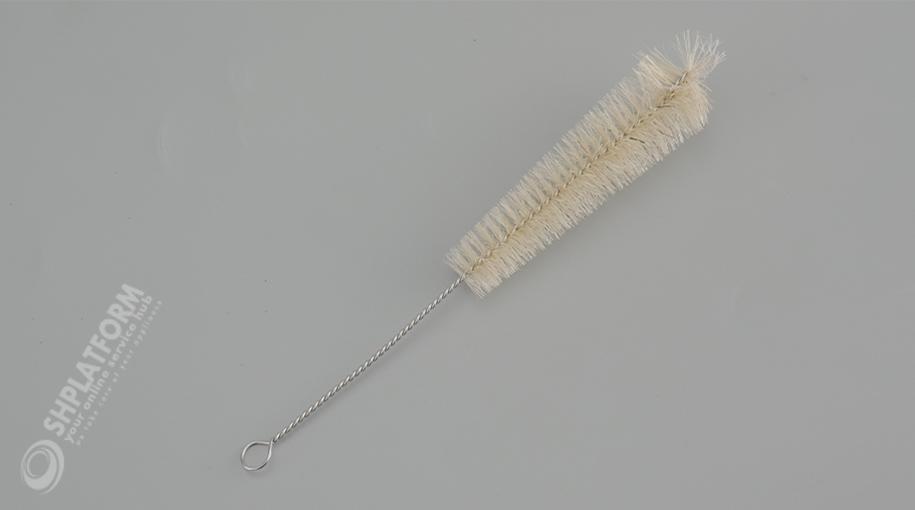
Clean the dirt stuck on the buoy.
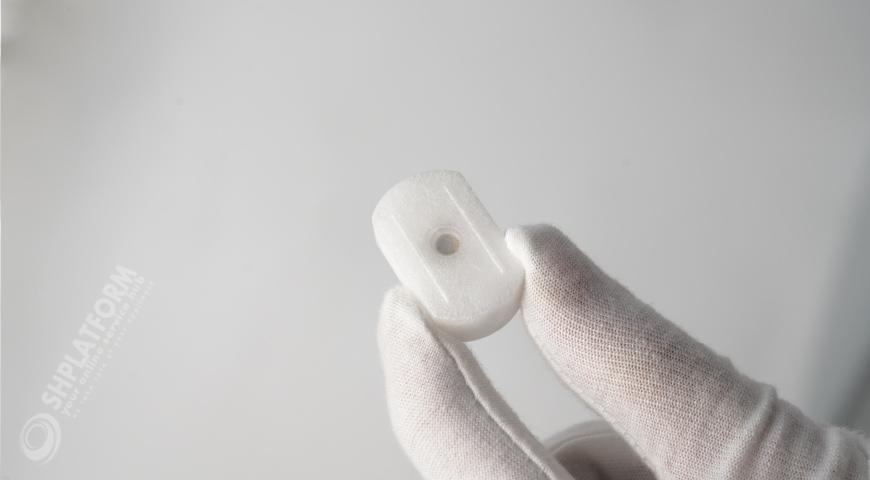
Clean the dirt stuck on the buoy.
Use a brush to clear the obstructions in the track.
After that, reverse steps 4-2 to install the buoy.
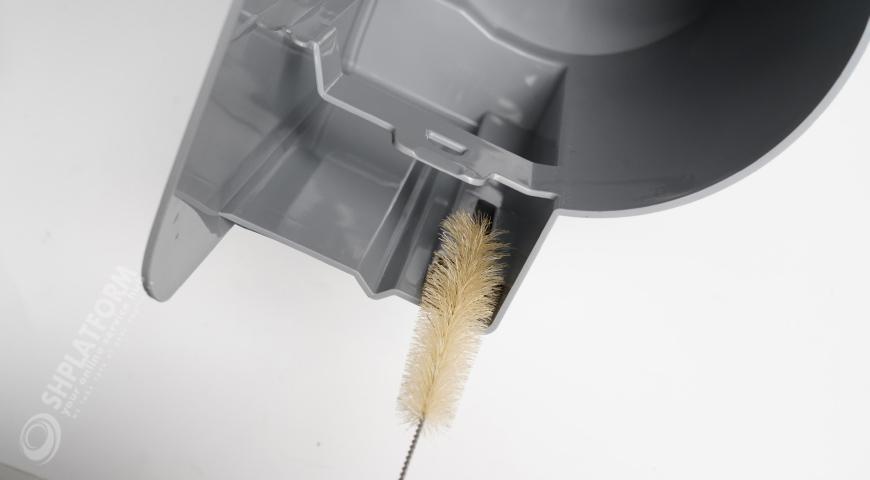
Use a brush to clear the obstructions in the track.
After that, reverse steps 4-2 to install the buoy.
PROCEDURE 5:Install the lid of water tank back
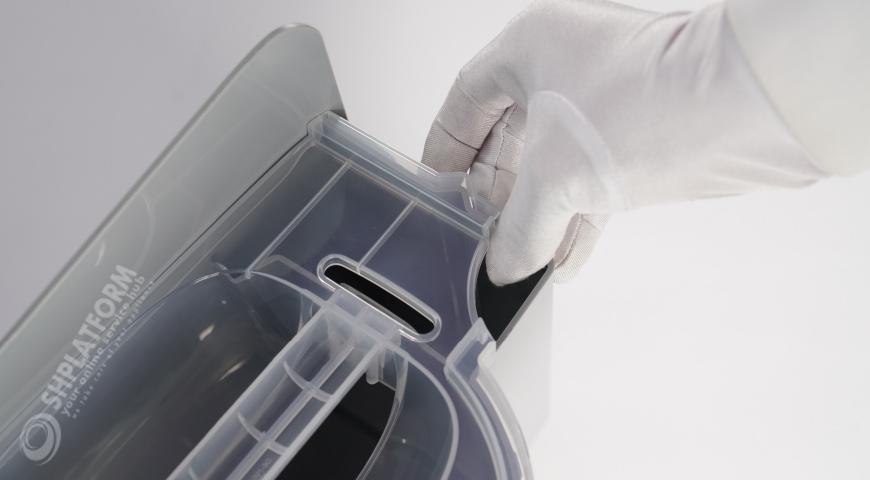
Reinstall the water tank handle assembly.

Reinstall the water tank handle assembly.
Attach the water tank handle assembly to the water tank.
Attach the water tank handle assembly to the water tank.
The buckle of the water tank handle must be assembled with the fixing hole of the water tank.
The buckle of the water tank handle must be assembled with the fixing hole of the water tank.
Press it down with a little force, and then check whether it is assembled in place when you hear a click.
Press it down with a little force, and then check whether it is assembled in place when you hear a click.
Press the other end down similarly, and assemble the buckle of the handle with the fixing hole of the water tank.
Press the other end down similarly, and assemble the buckle of the handle with the fixing hole of the water tank.
PROCEDURE 6:Install the decroative cover of water tank back
Install the assembled water tank back to its right place.
Install the assembled water tank back to its right place.
Install the water tank back.
Install the water tank back.
Make sure that the water tank is properly assembled, the machine would give a reminder of E1 out if the water tank is not properly assembled.
Make sure that the water tank is properly assembled, the machine would give a reminder of E1 out if the water tank is not properly assembled.
Install the decorative panel back.

Install the decorative panel back.
The decorative board is attracted to the machine through a magnet, and can be easily attracted when placed properly.
The decorative board is attracted to the machine through a magnet, and can be easily attracted when placed properly.

If you feel that the video is playing too fast to understand key details, you can follow steps below to get more detailed information.
Take out the decorative panel on the front of the machine.

Take out the decorative panel on the front of the machine.
If the water tank is not assembled in place, the machine will also report an error code E1.
If the water tank is not assembled in place, the machine will also report an error code E1.
Push the water tank into place and error code E1 will be eliminated.
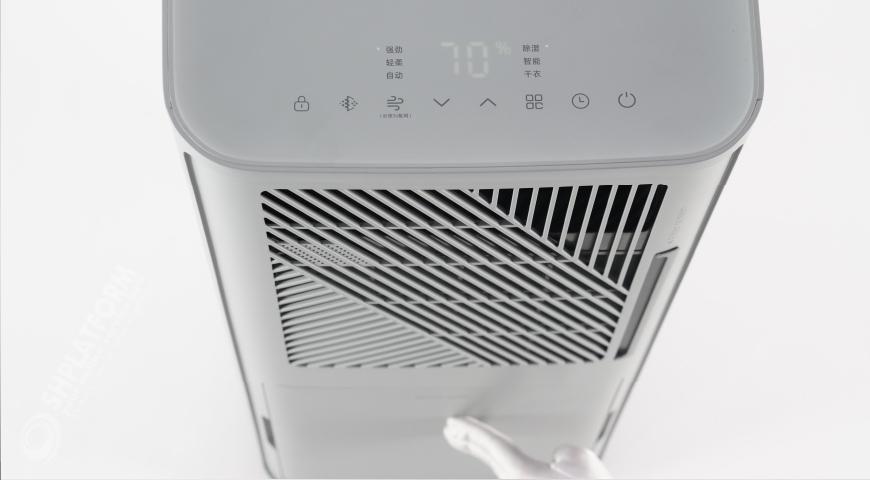
Push the water tank into place and error code E1 will be eliminated.
Install the decorative panel back.
Install the decorative panel back.
The decorative board is attracted to the machine through a magnet, and can be easily attracted when placed properly.
The decorative board is attracted to the machine through a magnet, and can be easily attracted when placed properly.

© Copyright 2023 SHPlatform | All rights reserved
